Jira Cloud data source
Learn how to set up a Jira Cloud data source and then move this data to one of the supported by Coupler.io data destinations.
Video tutorial:
The 2 steps to complete the setup
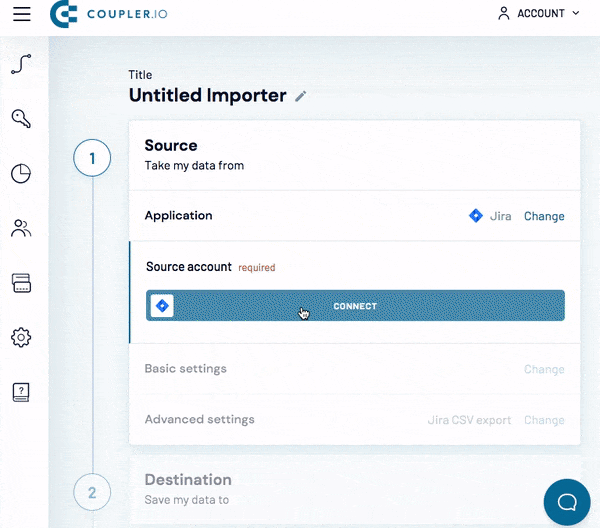
1. Set up your data source
- Select 'Jira' as a source application

- Connect your Atlassian account
- Click 'Connect'
- Log in to the chosen Atlassian account.
- Choose your site.
- Coupler.io needs specific consents to view your Jira data. Click 'Accept' to provide an access.
- Specify filter criteria

You can use Jira syntax to filter any issues by typing a custom JQL query. Alternatively you can paste an ID of the Jira filter save earlier.
Coupler.io will import all issues in case you leave this field empty. Learn more
This field supports macro. Learn more.
Note: If you would like to use not date, but dateTime macro in the JQL field you need to format it as it states above. For example:
project = Coupler.io and created > "{{8hoursago.format(YYYY/MM/DD HH:mm)}}"
Note: We suggest you to try your JQL in Jira interface first and copy paste it to Coupler.io after. To do that you need to set up search filters and then click on the 'Switch to JQL' button in Jira interface (see screenshot below). Here is an example:
project = CPL AND issuetype = Story AND status = "In Progress" AND assignee is EMPTY order by updated ASC<br>

1.4. Select the Import format

- Pick Jira CSV export to import data in the default format JIRA uses for its own CSV export.
- Pick Detailed data to import all data as is, including IDs, URLs, and other metadata to be placed in separate columns. Learn more
Custom fields import is handled in the following way:
- While importing multiple custom fields, the name of the field is specified in parentheses:
- If one custom field contains multiple values, these values will be distributed between multiple columns in a Google Sheet. The number of columns = the number of values the custom field contains. E.g., there is a custom field "Assignees" and it has 3 values. In this case, the import output will look as follows:
Overall, we try to preserve Jira manual export rules for Jira CSV export format.

1.5. Fill out the "Fields" field

Provide the names of the columns, as well as their order by entering each of them in a new line. If you leave this parameter empty, Coupler.io will select all navigable fields.
Note: every issue may have a different set of fields, as well as their numbers.
Where to get the column names?
Make the initial import with Fields empty. You’ll get your data with the names of all columns:

After that, you’ll be able to specify which columns you need for recurrent data imports:

2. Set up your data destination
Continue setting up the integration depending on the system where you want to import data to. See full list of supported data destinations and follow set up guide for chosen one.