Snowflake destination setup
General settings for all auth types
Step 1 - Locate Snowflake account identifier
Click your user icon -> open account selector -> account details:
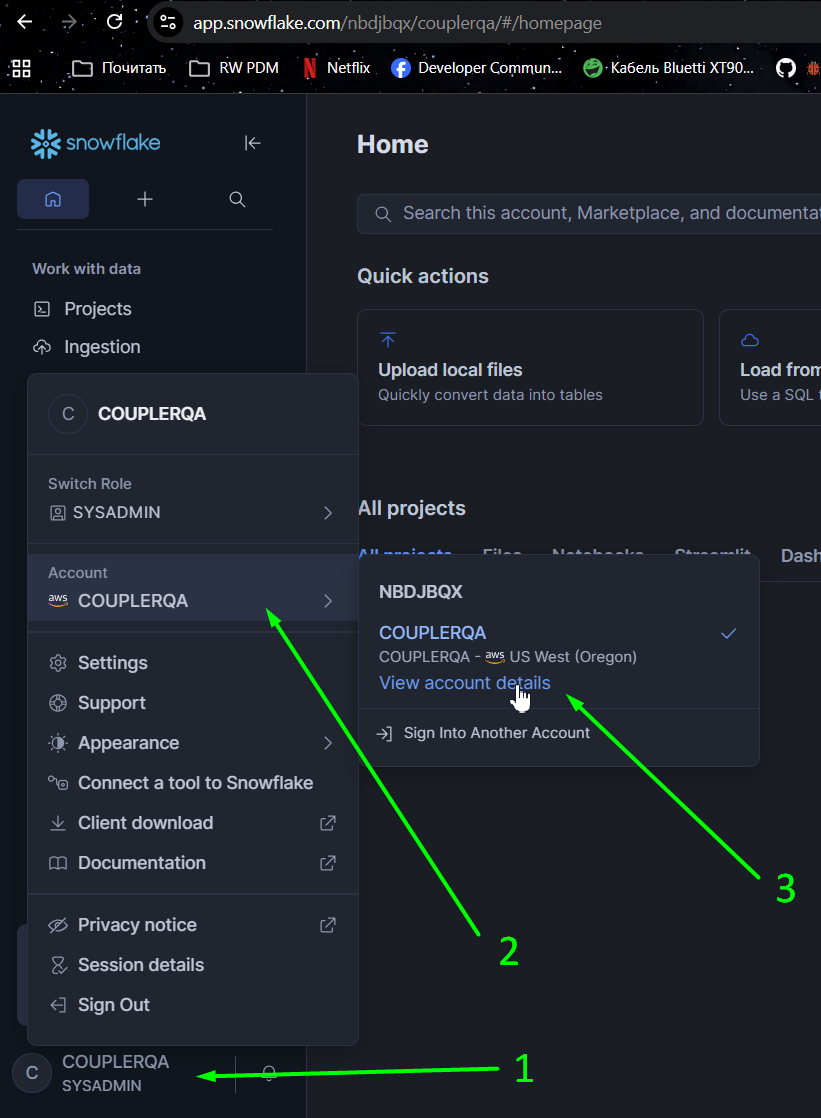
Copy Account identifier value:

Step 2 - Configure warehouse, user, and role
This section contains SQL commands to create specific user, warehouse and role to use for Coupler.io integration with Snowflake. If you already have them configured, proceed to step 3.
-- Create a specific warehouse for Coupler.io
CREATE WAREHOUSE coupler_warehouse WAREHOUSE_SIZE = XSMALL AUTO_SUSPEND = 30;

-- Create a specific user for the Coupler.io (service one, will not work for user/pass method)
CREATE USER IF NOT EXISTS "coupler_service_user" LOGIN_NAME="coupler_service_user" TYPE = service;

-- Create dedicated role
CREATE ROLE coupler_io_role;

-- Grant warehouse usage
GRANT USAGE ON WAREHOUSE coupler_warehouse TO ROLE coupler_io_role;

-- Option A: Allow database creation (more flexible, allows Coupler to create new databases)
GRANT CREATE DATABASE ON ACCOUNT TO ROLE coupler_io_role;

-- Option B: Restrict to specific database (more secure, access limited to my_database)
GRANT USAGE ON DATABASE my_database TO ROLE coupler_io_role;
GRANT CREATE SCHEMA ON DATABASE my_database TO ROLE coupler_io_role;
GRANT ALL ON ALL SCHEMAS IN DATABASE my_database TO ROLE coupler_io_role;
GRANT ALL ON ALL TABLES IN DATABASE my_database TO ROLE coupler_io_role;
GRANT ALL ON FUTURE TABLES IN DATABASE my_database TO ROLE coupler_io_role;

-- Assign to user
GRANT ROLE coupler_io_role TO USER "coupler_service_user";
Step 3 - Provide account identifier, warehouse and role settings to Coupler.io
Paste account identifier from step 1:

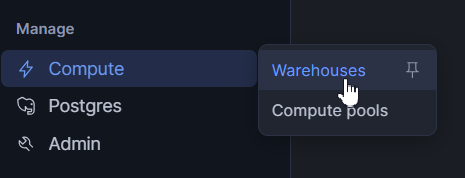
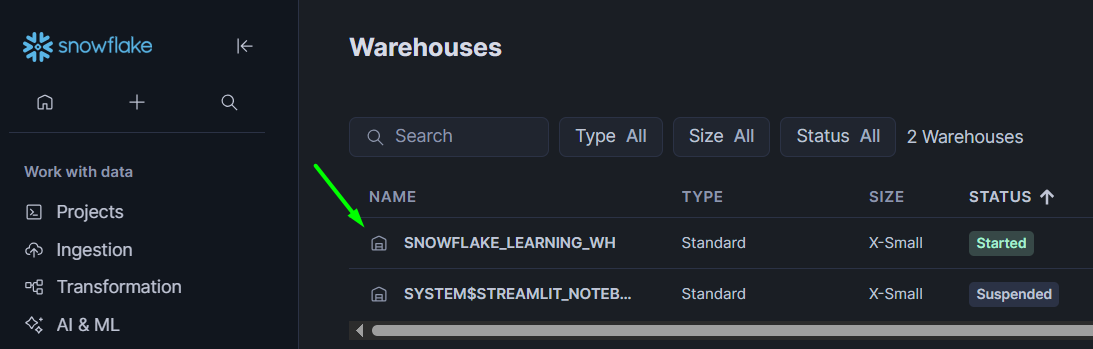
Copy name of warehouse created on step 2 or you can use already existing warehouse. To find it: navigate to Compute -> Warehouses menu -> Copy name of warehouse:

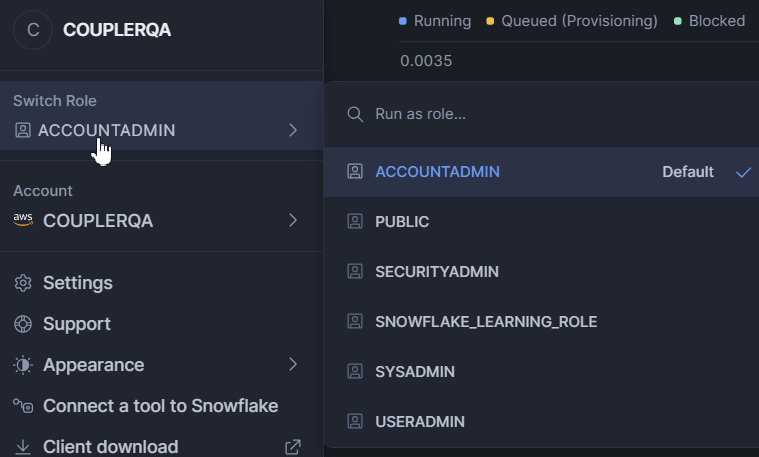
If you defined needed default role for user - keep role field empty. If you want to specify role - enter it's name in field:

Select auth type & configure it
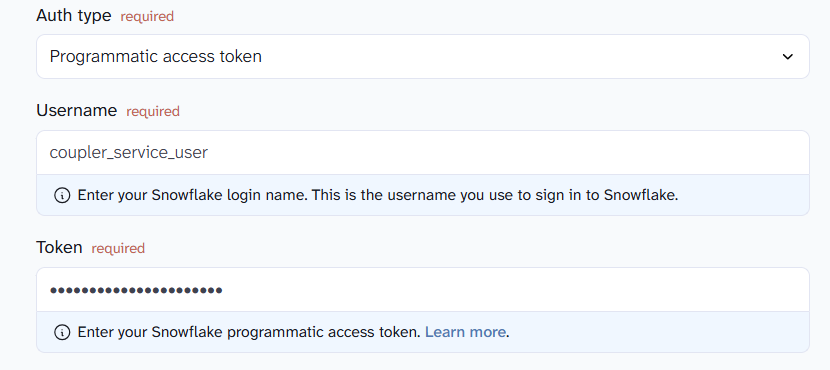
Option A - Connect using Programmatic access token (PAT)
Step 4 - Create a network policy
A network policy controls which IP addresses are allowed to connect to Snowflake.
-- Create the Network Rule
CREATE NETWORK RULE COUPLER_IP TYPE = 'IPV4' VALUE_LIST = ('34.123.243.115', '34.170.96.92');

-- Create the Network Policy
CREATE NETWORK POLICY COUPLER_NETWORK_POLICY;

-- Apply the rule to the policy
ALTER NETWORK POLICY COUPLER_NETWORK_POLICY SET ALLOWED_NETWORK_RULE_LIST = (COUPLER_IP);

-- Apply the policy to the Coupler user
ALTER USER "coupler_service_user" SET NETWORK_POLICY = COUPLER_NETWORK_POLICY;
Step 5 - Generate token
Option A - Via Snowsight (UI):
- Sign in to Snowsight
- Navigate to Governance & security > Users & roles
- Select the user
- Under Programmatic access tokens, select Generate new token
- Enter a name, set expiration (up to 365 days, default 15 days), and optionally restrict to a specific role (recommended).
- Select Generate and copy the token immediately - it cannot be retrieved later
Option B - Via SQL:
ALTER USER "coupler_service_user" ADD PAT coupler_token ROLE_RESTRICTION = coupler_io_role DAYS_TO_EXPIRY = 150;
Step 6 - Enter auth details to Coupler.io connection settings
Paste username and copied token:
Option B - Connect using Key Pair
Key Pair authentication uses an RSA key instead of a password.
Step 1 - Generate an RSA key pair
On the customer's machine (not in Snowflake):
# Generate a private key (unencrypted)
openssl genrsa 2048 | openssl pkcs8 -topk8 -inform PEM -out rsa_key.p8 -nocrypt

# Or generate an encrypted private key (will prompt for a passphrase)
openssl genrsa 2048 | openssl pkcs8 -topk8 -v2 des3 -inform PEM -out rsa_key.p8

# Generate the corresponding public key
openssl rsa -in rsa_key.p8 -pubout -out rsa_key.pub
This produces two files:
rsa_key.p8— the private key (customer keeps this secret)rsa_key.pub— the public key (assigned to the Snowflake user)
Step 2 - Assign the public key to the Snowflake user
-- Copy the public key content (without the BEGIN/END headers)
ALTER USER coupler_service_user SET RSA_PUBLIC_KEY = 'MIIBIjANBgkqh...';
Important: Exclude the
-----BEGIN PUBLIC KEY-----and-----END PUBLIC KEY-----delimiters and any line breaks when pasting into the SQL command.
Step 3 - Verify the key was assigned correctly (optional)
DESC USER coupler_service_user;
-- Look for the RSA_PUBLIC_KEY_FP property — it should show a fingerprint
Step 4 - Enter auth details to Coupler.io connection settings
Username (required)
Enter login name of Snowflake user associated with key.
Private key (required)
Paste your RSA private key in PEM format:
-----BEGIN PRIVATE KEY----- ... -----END PRIVATE KEY-----
Passphrase (optional)
If your private key is encrypted, enter the passphrase. If not encrypted, leave it empty.
Option C - Connect using your Username & Password
Password authentication is being deprecated by Snowflake and will be removed later this year. We recommend using Programmatic access token (PAT) authentication instead.
Username (required)
Enter your Snowflake user login name.
Password (required)
Enter the password for this Snowflake user.
Note: Your Snowflake user must have permissions to access the destination database/schema and create/write tables.